TITLE: Technical Protocol for the Rehabilitation of Clearance-Rack Houseplants
CONTENT:
This article was researched and reviewed by Leo, an indoor plant specialist.
# Protocol for Rehabilitating Clearance Plants: A 7-Step Technical Framework for High Success Rates
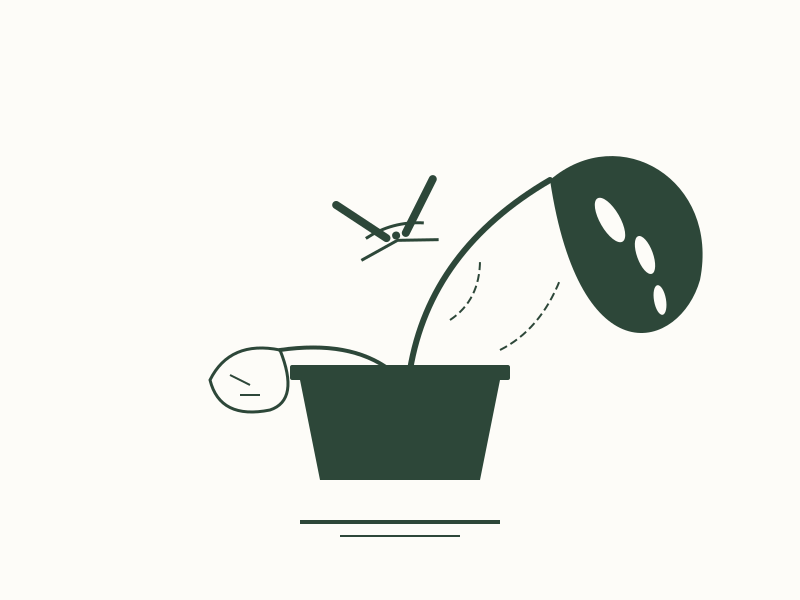
The rehabilitation of clearance-rack plants, such as a *Philodendron verrucosum*, requires a systematic approach to address physiological stress and potential pathogen introduction. These specimens often exhibit signs of advanced dehydration or overwatering, necessitating a structured recovery process rather than standard maintenance routines.
Purchasing clearance plants often involves acquiring specimens with significant pest pressure or physiological damage. Without a technical protocol, these plants frequently fail or introduce pathogens to existing collections. Successful rehabilitation requires treating the specimen as a biological salvage project rather than a standard gardening task.
Historical data, such as the loss of rare Aroid collections during power outages, demonstrates that cellular rupture from environmental stress is often irreversible. While clearance plants are typically not frozen, they often exist near the threshold of cellular collapse. Effective recovery depends on precise biological intervention.
The Triage Phase: Physiological Factors in Early Failure
Immediate exposure to high light and heavy irrigation is a common cause of failure in clearance plants. These specimens often suffer from chronic underwatering followed by erratic overwatering. This cycle induces physiological shock characterized by closed stomata, the death of fine root hairs, and a suppressed metabolic rate.
The 21-Day Isolation Protocol
All new clearance acquisitions must be isolated from the primary grow space regardless of initial visual inspections. A dedicated quarantine zone with controlled humidity is necessary to monitor for latent pest issues.
A three-week period is required to account for the life cycles of common pests, such as thrips and spider mites. Eggs embedded in leaf tissue or larvae in the substrate may not be visible upon purchase. Failure to isolate risks the biosecurity of the entire collection. Pathogens like powdery mildew can also manifest during this period.
Visual Inspection: Cosmetic Damage vs. Physiological Decline
It is necessary to differentiate between aesthetic defects and indicators of physiological failure. For example, marginal necrosis on *Calathea* leaves is often a cosmetic result of low humidity or mineral accumulation. Conversely, a soft, necrotic stem base on an *Aglaonema* indicates systemic decline.
Inspect the primary growth points. In *Monstera* species, a blackened terminal bud indicates the loss of the primary lead, requiring the plant to activate axillary buds. If white, mobile organisms are present in the substrate, they are likely mealybugs, which require immediate chemical or manual intervention.
Olfactory Detection of Bacterial Pathogens
The presence of a sulfurous or putrid odor upon removing the plant from its container indicates anaerobic bacterial activity on necrotic tissue. Pathogens such as *Erwinia* and *Pseudomonas* spread through the plant’s vascular system. If these odors are present, surgical removal of affected tissue is required.
Establishing a Controlled Recovery Environment
A recovery zone should prioritize functionality over aesthetics. Utilizing a plastic enclosure with damp perlite creates a high-humidity microclimate, reducing the vapor pressure deficit (VPD). When ambient air is dry, transpiration rates exceed the water uptake capacity of damaged roots. Saturated air minimizes this pressure on the root system, facilitating the recovery of specimens with minimal viable tissue.
Root Triage: Assessing Subterranean Health in Tropical Specimens
Root health is the primary indicator of plant viability. While foliage may show delayed signs of distress, root systems often exhibit symptoms of decline much earlier. A thorough inspection of the root ball is mandatory for all clearance acquisitions.
Differentiating Healthy Roots from Cellular Necrosis
Healthy roots in most tropical species are firm and typically white or tan. If the outer sheath (the epidermis and cortex) detaches easily from the vascular cylinder, the plant is experiencing root rot. This cellular necrosis results from oxygen deprivation and subsequent cell wall collapse.
Mechanical Removal of Necrotic Root Tissue
All necrotic tissue must be removed to prevent the spread of decay. Use bypass pruners sterilized with 70% isopropyl alcohol to cut back to healthy, white tissue. The presence of millipedes in the soil typically indicates the consumption of decaying organic matter; while they are not the primary cause of rot, the underlying necrotic tissue must be addressed.
Hydrogen Peroxide Applications: Concentration and Methodology
After removing necrotic tissue, the remaining root system should be treated with a solution of one part 3% hydrogen peroxide to two parts water. This application eliminates remaining fungal spores and anaerobic bacteria while increasing oxygen levels in the rhizosphere, which supports root respiration.
Substrate Replacement: Limitations of Commercial Nursery Soil
Substrates used in commercial nurseries are often optimized for high-humidity greenhouse environments. In a standard residential setting, these peat-based soils can become either hydrophobic or excessively saturated and anaerobic.
The original substrate should be removed and the roots cleaned. A replacement substrate should be airy and facilitate gas exchange, utilizing components like bark, perlite, and coco coir. Oxygen is required for cellular respiration in the roots, which is a prerequisite for water and nutrient uptake.
The Node Strategy: Identifying Viable Meristematic Tissue
Specimens that have lost all foliage remain viable as long as healthy nodes are present. These nodes contain the potential for new growth.
Identification of Meristematic Regions
The node is the site on the stem where leaves, aerial roots, or branches originate. These areas contain meristematic tissue—undifferentiated cells capable of developing into various plant organs. A firm, green node indicates biological viability.
Node Turgidity as a Survival Metric
Assess the stem for turgidity. A desiccated or necrotic stem will feel brittle or soft. A viable stem will exhibit resistance to pressure, indicating maintained internal turgor pressure within the cells.
Stimulating Axillary Buds on Stressed Stems
Plants possess axillary buds at the nodes, which are typically kept dormant by apical dominance. When the primary growing tip is damaged, the cessation of specific hormone flows signals these buds to activate. High-humidity environments facilitate this process, allowing for the regeneration of the plant from stem segments.
The Cambium Scratch Test for Tissue Viability
To determine the viability of woody stems, a small section of the outer bark can be removed to inspect the vascular cambium. A bright green appearance indicates living tissue, while brown or gray indicates necrosis. Pruning should continue downward until healthy cambium is identified.
Metabolic Stabilization: Contraindications for Fertilization
Stressed plants lack the capacity to process supplemental nutrients. Applying fertilizer to a specimen with a compromised root system can exacerbate physiological stress.
Mechanisms of Osmotic Shock
Fertilizers increase the salt concentration in the substrate, altering the osmotic potential. If the salt concentration in the soil exceeds that within the roots, water may be drawn out of the plant tissue. This results in fertilizer burn, which can be fatal to weakened specimens.
Photosynthetic Capacity and Nutrient Assimilation
Nutrient processing requires metabolic energy derived from photosynthesis. If a plant has lost significant leaf surface area, its ability to generate the sugars necessary for nutrient uptake is reduced. Fertilization should be deferred until active growth is observed and new leaves have hardened.
Reintroduction of Nitrogen and Phosphorus
Fertilization should resume only after the second flush of new growth. The initial leaf produced during recovery often relies on stored carbohydrate reserves. The second leaf indicates that the root system is sufficiently established to support the metabolic costs of nutrient assimilation. Smaller leaves on species like *Monstera* often indicate light deficiency rather than nutrient lack.
Application of Kelp Extracts for Stress Mitigation
Liquid kelp or seaweed extracts function as biostimulants rather than traditional fertilizers. They contain hormones that assist in stress tolerance and stimulate cell division without the risk of osmotic burn associated with mineral salts.
Clearance plants are often transitioned from low-light retail environments or high-intensity nursery settings. Their photosynthetic apparatus requires time to adjust to new light levels.
Managing the Light Intensity Gradient
Moving a plant from a low-light environment to high-intensity lighting can cause phototoxicity. This occurs when the plant cannot process the incoming light energy, leading to the formation of free radicals that damage chlorophyll and leaf tissue.
Acclimation should occur over a two-week period, gradually moving the plant from medium light to its permanent location. High-humidity-dependent species like *Alocasia* may require diffused light to prevent rapid desiccation.
Humidity Regulation for Thin-Leaved Tropicals
Residential environments often have low relative humidity, which is detrimental to thin-leaved species like *Stromanthe* or *Calathea*. These plants experience high rates of transpiration. Humidification is necessary for survival; misting is ineffective and may promote fungal pathogens.
Stomatal Conductance and Transpiration Rates
Stomata regulate gas exchange and water loss. In stressed plants, stomatal control may be compromised, leading to excessive transpiration or inhibited CO2 uptake. Using a humidity dome or enclosure creates a stable environment with low VPD, reducing the physiological demand on the plant.
Incremental Placement Under High-Intensity LED Lighting
Light intensity from LEDs decreases significantly with distance. Rescue plants should be placed at the periphery of the light footprint and moved toward the center only as they demonstrate increased vigor.
Terminal Propagation as a Final Recovery Strategy
If root or basal stem rot is extensive, propagation of the remaining healthy tissue is the only viable recovery strategy.
Stem Cuttings: Preserving Genetic Material
Identify healthy tissue at least one inch above the site of decay. Ensure the cross-section of the stem shows no internal discoloration. Allow the cutting to callous for approximately one hour to form a protective barrier against pathogens before placing it in a propagation medium.
Comparison of Water and Perlite Propagation Media
Damp perlite in a sealed container is often superior for rescue propagation. Roots developed in water are morphologically different and may struggle to adapt to soil. Perlite provides a sterile environment with an optimal balance of moisture and aeration.
Utilization of Humidity Domes for Rootless Cuttings
Cuttings lack a root system for water uptake and rely on internal moisture. A humidity dome minimizes water loss through transpiration, providing the necessary time for adventitious root development from the nodes.
Strategic Division of Clearance Specimens
Dividing a failing plant into multiple nodal cuttings increases the probability of at least one successful recovery. This approach maximizes the potential return on the acquisition.
Long-Term Development: From Recovery to Maturity
The objective of rehabilitation is the development of a mature specimen. This process requires an extended timeline.
The 12-Month Recovery Timeline
Months 1-3: Root establishment. Minimal foliage growth is expected.
Months 4-8: Stabilization. Initial foliage may be undersized or exhibit minor deformities.
Months 9-12: Resumption of vigor. The plant achieves standard growth rates.
Structural Pruning for Growth Optimization
Once health is restored, pruning can be used to correct etiolated growth resulting from poor retail conditions. Removing elongated, sparsely leaved stems encourages lateral branching and a denser growth habit.
Implementation of Permanent Support Structures
Climbing species such as *Epipremnum* or *Monstera* should be provided with vertical support once stabilized. Vertical orientation often triggers the development of larger, mature foliage. Providing a trellis or moss pole simulates natural growth conditions and promotes structural integrity.
Data Collection and Growth Monitoring
Maintaining photographic records of the plant’s progress provides objective data on recovery rates. Comparing current growth to the initial state of the clearance specimen allows for an accurate assessment of the rehabilitation protocol’s effectiveness.
For more technical advice on maintaining plant health, refer to our guide on [how to treat thrips on houseplants](https://www.plantgrowthguide.com/how-to-treat-thrips-houseplants/).
For more technical advice on maintaining plant health, refer to our guide on [how to treat thrips on houseplants](https://www.plantgrowthguide.com/how-to-treat-thrips-houseplants/).
For more technical advice on maintaining plant health, refer to our guide on [how to treat thrips on houseplants](https://www.plantgrowthguide.com/how-to-treat-thrips-houseplants/).
Leo Vance
Leo Vance is a veteran botanical curator and rare plant collector with over 15 years of experience in biological engineering and hormonal optimization of indoor greenery. After a catastrophic loss of his collection in 2018, he dedicated his life to sharing technical, factual, and practical plant care strategies to help others build resilient indoor sanctuaries.